My chosen HACS integrations

Last week, I wrote about HACS, the Home Assistant Community Store, which allows many additional community-provided integrations to be installed into Home Assistant. This week, I’m going to list those that I use.

DVLA Vehicle Enquiry Service

The DVLA Vehicle Enquiry Service allows you to monitor the publicly-available data about any UK car. When you set up the integration, you input a registration number, and it’ll download the data from the DVLA’s database. This includes useful information like when the car’s MOT is due, or when the car tax expires – these can be automatically added to a calendar widget on your Home Assistant dashboard.

HASS Agent

The HASS Agent integration allows you to use HASS Agent, a Windows desktop utility for managing Home Assistant. Once set up, you can configure automations to shut down your Windows computer, receive notifications, or monitor its state.

Nest Protect

We have a Nest Protect smart smoke alarm, which isn’t supported by the built-in Nest integration in Home Assistant. Google hasn’t made a public API for it, and so to integrate it with Home Assistant, you need to use this HACS integration. This is a good example of why an integration is in HACS and not Home Assistant core; setting it up requires you to log in to your Nest account in a private window, and then use Google Chrome’s developer tools to essentially ‘steal’ the cookies so that Home Assistant can hijack the same browser session.

Google has talked about adding the Nest Protect to its Google Home app for years, meaning that the standalone Nest app can be retired. But it hasn’t happened yet. When it does, perhaps there will be a proper API, and this will be available in Home Assistant core.

Timer Bar Card

This is a new card for your dashboard, which creates a progress bar for sensors that have a countdown. I use this for our Bosch dishwasher, so that as well as showing how long it has left, it shows visually how complete the washing cycle is.
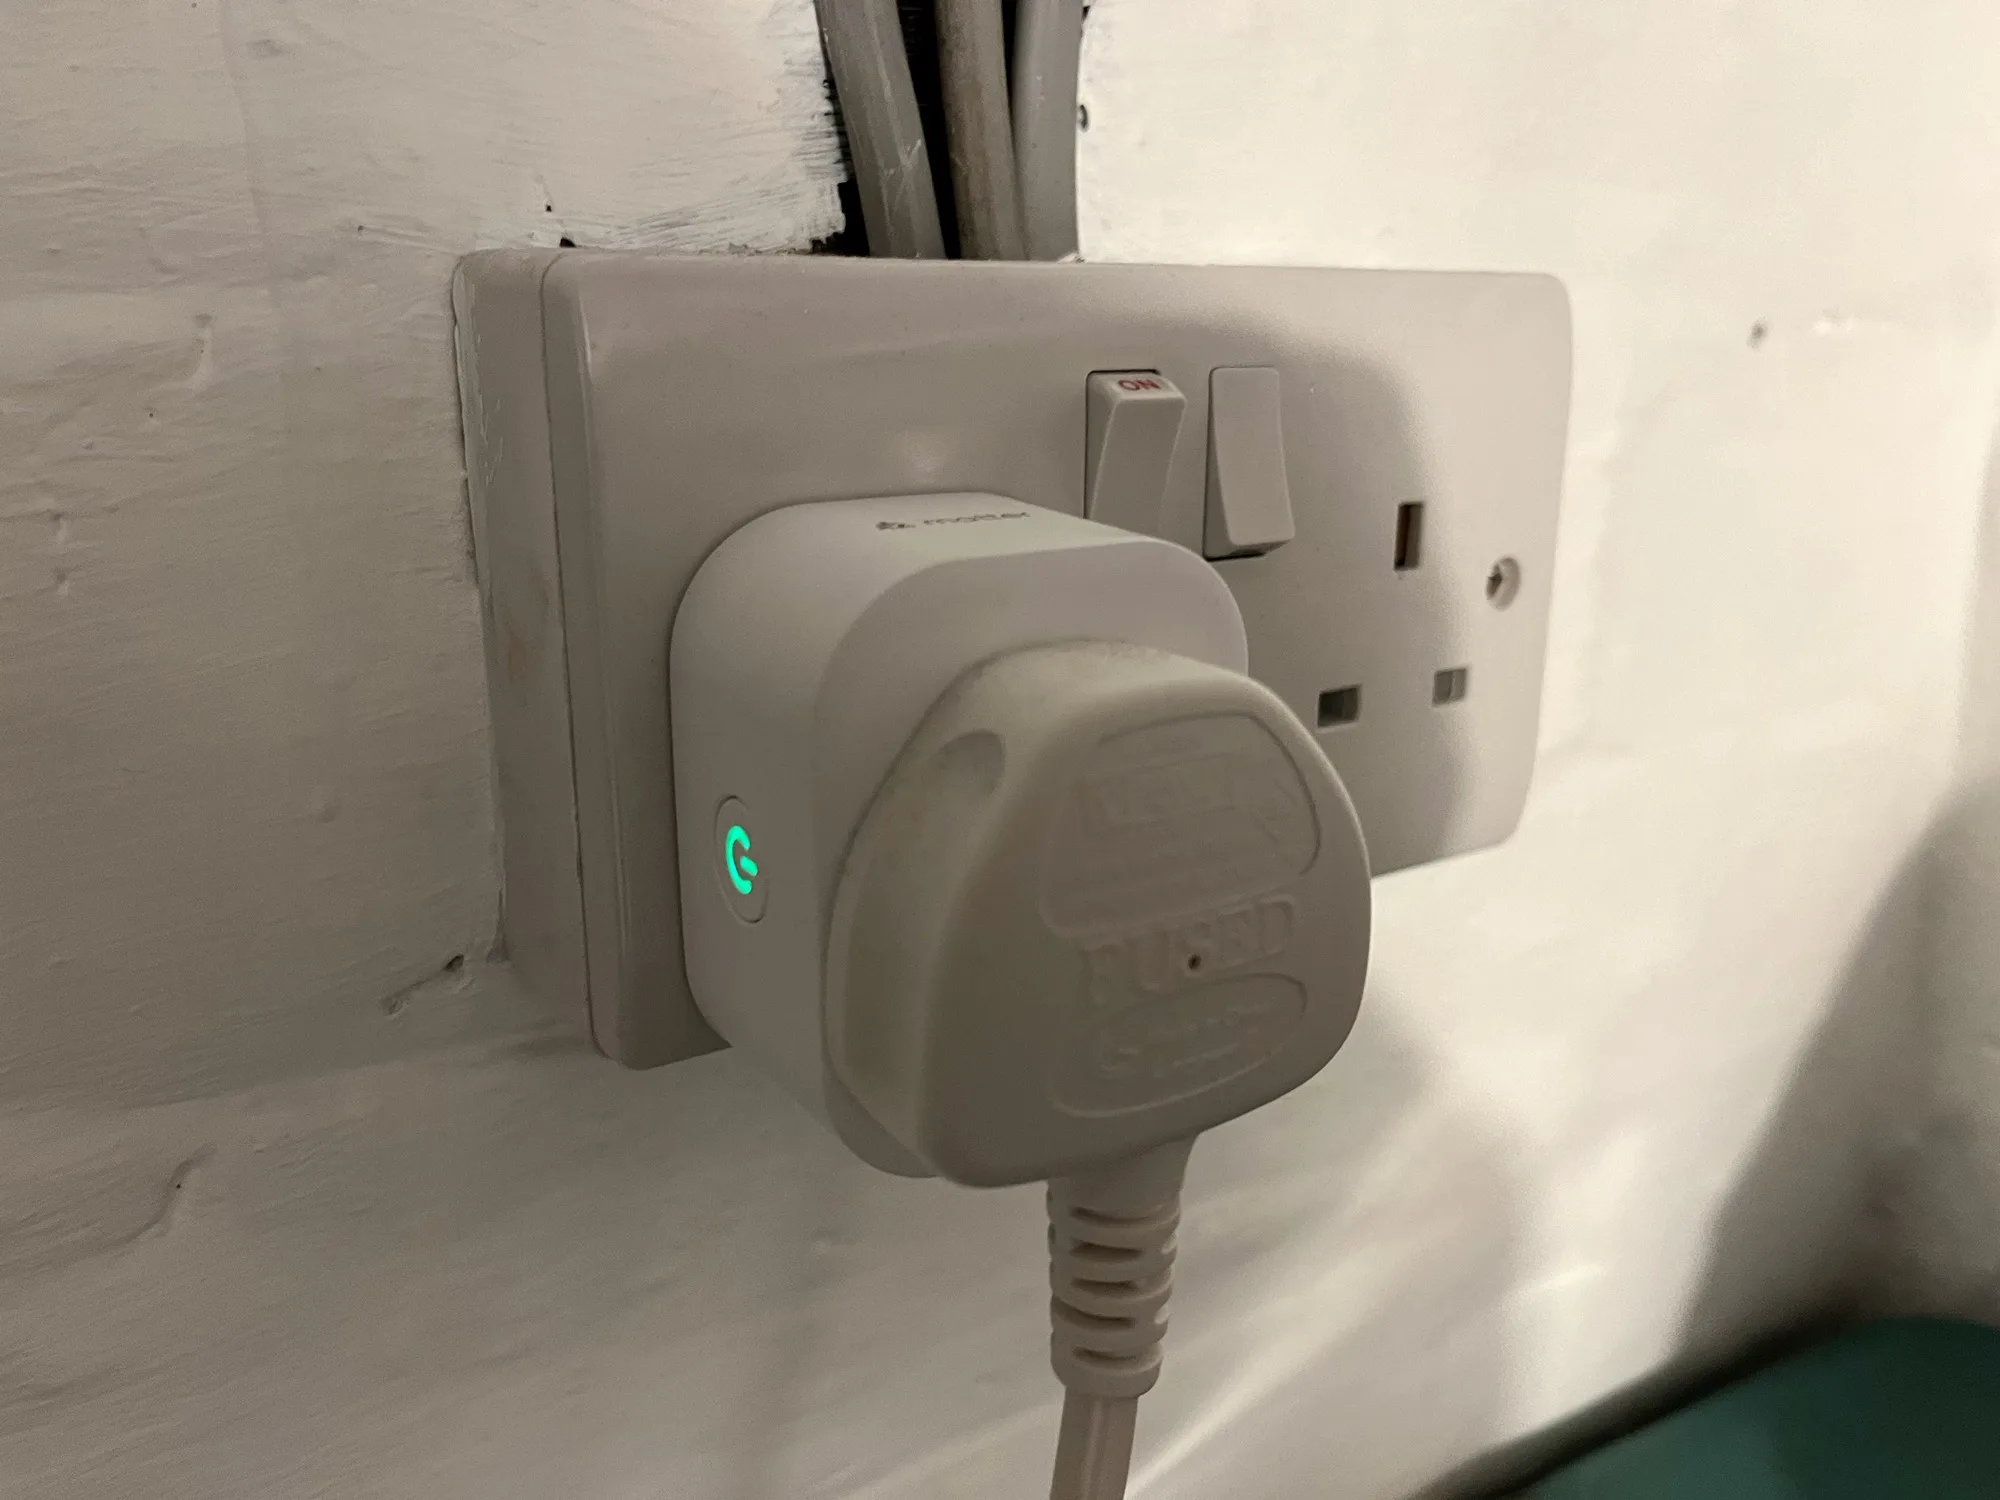
Meross LAN

We have a pair of Meross energy monitoring smart plugs, and although they support Matter, to be able to do more than just turn them on and off, I need to use the Meross LAN integration. It supports both HTTP and MQTT communication, and will work both using Meross’ cloud MQTT servers and your own local MQTT broker, if you have one. Once set up, you can use the energy monitoring sensors in Home Assistant.

Octopus Energy

We get our gas and electricity from Octopus Energy (referral link, you’ll get £50 off your first bill if you sign up), and they have an API that any customer can use. The Octopus Home Asssitant integration lets you bring your meter data into Home Assistant, and you can set up automations to opt you in automatically to any energy saving sessions. The data is updated daily, unless you have a Octopus Home Mini which can provide realtime data for electricity, and half-hourly data for gas.

As well as offering some of the best unit rates for energy export, the fact that Octopus offers an API means that just about every UK geek that I know uses them. They also seem a lot easier to deal with than other energy suppliers we’ve used in the past.

HACS – community components for Home Assistant

A screenshot of the HACS web site

Whilst Home Assistant is already the most flexible smart home platform, with hundreds of built-in integrations, HACS is an optional additional tool to add even more integrations.

HACS stands for ‘Home Assistant Community Store’, and it allows you to download and install custom components from the wider Home Assistant community. It’ll also keep them updated for you. Home Assistant has long supported so-called ‘custom components’, which allows functionality beyond the standard built-in integrations, but HACS makes finding, installing and updating these much easier.

A couple of weeks ago, version 2.0 of HACS was released. This includes a new addon for those using Home Assistant Operating System or Supervised mode, which makes it easier to install. Updates are now handled via Cloudflare for improved performance.

As well as additional integrations, HACS also allows you to install different cards for your dashboards, and different themes. For example, Mushroom is a set of replacement cards which some prefer the look of.

Compared to the built-in integrations, which are maintained by the Home Assistant project, those in HACS are maintained by the community. This means that they may not be tested as rigorously as the official integrations, and so it’s important that you have regular backups in case things go wrong. Also, expect more bugs.

As for why integrations are only in HACS and not Home Assistant itself, there are a few reasons:

  1. It’s a niche service that may only apply to one country, or is of limited wider use.
  2. It uses scraping – this is where there isn’t a publicly available API for the service and so it scrapes the contents of web pages to work. These aren’t permitted in core Home Assistant integrations.
  3. It’s still in active development and not ready to be merged into the main Home Assistant release.
  4. It duplicates the functionality of a core Home Assistant integration but does so in a different way.

I’m currently using eight custom integrations through HACS, and I’ll discuss these in a later blog post. If you’re a Home Assistant user and haven’t already checked out HACS, have a look to see if you can extend its features even further.

Creating a Bluetooth proxy with ESPHome

A photo of an m5stack Atom Lite which has been flashed with ESPHome firmware to act as a Bluetooth Proxy for Home Assistant

My latest Home Assistant project has been creating a Bluetooth Proxy – a device that essentially extends the range of my Raspberry Pi’s Bluetooth signal. To do this, I’ve purchased a small device with a ESP32 chip on, and flashed it with firmware from ESPHome.

Okay, so that introduction has a lot of jargon. Allow me to break it down a little.

What is a Bluetooth proxy?

Because Bluetooth connections are point-to-point, you can’t use range extenders like you can with Wifi, Zigbee and Thread networks. That means that any Bluetooth devices that you want to connect to Home Assistant need to be in range of the device that you’re running Home Assistant on. I recently moved my Raspberry Pi to a different location, which meant that it was out of range of one of my Bluetooth thermometers.

A Bluetooth proxy acts as a kind-of bridge between Bluetooth and Wi-Fi. You place the proxy device within range of the Bluetooth devices that you want to connect to Home Assistant, and connect it to your home Wi-Fi network. Once set up, Home Assistant should see your Bluetooth devices as if they were in range.

If you’re running Home Assistant Container, then a Bluetooth proxy may also be easier to set up than a USB Bluetooth dongle. Passing USB devices into a Docker image doesn’t always work well.

It’s worth noting here that Bluetooth proxies are just a Home Assistant ‘thing’. They won’t help you connect a Bluetooth speaker to, say, a smartphone that’s out of range. Also, you can’t buy a device that works as a Bluetooth proxy out of the box. Seriously, if you go onto Amazon and search for ‘Bluetooth proxy’ (sponsored link), all you will get is results for Bluetooth adaptors and development boards with ESP32 chips.

The M5Stack Atom Lite

Whilst there are lots of boards that you can buy, a good option is the M5Stack Atom Lite (also available from AliExpress, where I got mine). This is because it comes with a plastic case, and connects easily using a USB-C cable. You could buy a different board and make your own case for it, but I don’t have a lot of time right now and don’t own a 3D printer. Besides, it costs less than £10 delivered.

The device is tiny – about the size of a 50p piece, and less than a centimetre thick. Because it’s a development board, it also comes with several pins to connect to other devices, but these aren’t necessary if you’re just using it as a Bluetooth proxy. Inside, is the Espressif ESP32 chip.

There are other ESP32-based products in the M5Stack Atom range, that add (for example) a microphone or GPS chip, but again, we don’t need these for a simple Bluetooth proxy.

Installing ESPHome

ESPHome is a sister project to Home Assistant, as they’re both managed by the Open Home Foundation. It’s similar to Tasmota, which I’ve blogged about before, in that they’re both custom firmware packages that you can flash onto ESP devices. Whilst Tasmota and ESPHome can do many of the same things, if you want a Bluetooth proxy then you’ll need to use ESPHome as Tasmota doesn’t support it.

Probably the easiest way to install ESPHome is using one of the ready-made projects. These can be flashed directly from your web browser, as long as you’re using Chrome or Edge (Firefox doesn’t yet support WebSerial so won’t work). You’ll need to connect your Atom Lite to your computer using a USB-C cable that supports both data and charging. You may also need to install the USB drivers – on my Windows 10 machine, the ‘CH9102_VCP_SER_Windows’ download worked. You should then be able to install the firmware, which will take a couple of minutes. Once done, you’ll be prompted for your home Wi-Fi network name and password, and then you should be good to go. Home Assistant will hopefully detect your new Bluetooth proxy automatically.

Managing your Bluetooth proxy in ESPHome

I used ‘hopefully’ in the previous sentence, because this didn’t happen in my case. As I used Home Assistant Supervised, I was able to install the official ESPHome addon; if you use Docker, you can just run docker pull ghcr.io/esphome/esphome to install it. Once installed, the ESPHome addon/docker image should detect your Bluetooth proxy and allow you to ‘adopt’ it.

This will let you view the hostname of your Bluetooth proxy device, which will be something like ‘atom-bluetooth-proxy-wibble.local‘. You can then add the ESPHome integration to Home Assistant, specifying the hostname, and you’ll be good to go. As soon as the integration was working, Home Assistant was able to see a new Bluetooth device and allowed me to configure the integration.

Going forward, you should find that Home Assistant is able to automatically update your ESPHome devices whenever new firmware is available – this is a new feature from the 2024.07 release. But you can also use the ESPHome addon/docker image to add or change features on your device. You could, for example, allow your device to act as an iBeacon as well (I think).

One thing to bear in mind is that Bluetooth and Wi-Fi both use the same 2.4 GHz frequency band. So, if you’re comfortable building your own board with a wired Ethernet connection instead of Wi-Fi, then you may get better performance.

Comparing different smart home protocols

An AI-generated image of various smart devices connecting to a home

When I started acquiring smart devices for my home, my focus was on those that worked over Wifi (or Ethernet) – I wasn’t really aware of the likes of Zigbee, Z-Wave and other protocols that were out there. In particular, I avoided those that required the purchase of a hub or bridge, due to the higher upfront cost.

Now that I’m further along my smart home journey, I’m more open to considering a range of different protocols. They all have their advantages and disadvantages to consider.

Wifi (and Ethernet)

I’m grouping these together as devices that are visible to a standard home network and have their own IPv4 address. The majority of smart home devices use Wifi, as there’s usually no need to buy an additional hub or bridge. Therefore, set-up is usually easy (sometimes aided by Bluetooth), and their range is fine as long as they can pick up your home’s Wifi signal. It’s also very easy to connect these devices to cloud services.

In terms of disadvantages: Wifi primarily uses the 2.4 GHz frequency band, which is used by lots of things and so there’s a potential for interference. The ease of connecting these devices to the cloud can also be seen as a flaw; they’re more susceptible to being compromised by bad actors, and don’t offer as much privacy. Wifi is also quite power-hungry – devices that don’t plug into the mains will need their batteries changing more frequently.

Bluetooth

As mentioned, Bluetooth is often used with Wifi to initially provision devices, but some Bluetooth-only devices can be used in a smart home. For example, there’s my Bluetooth thermometers, which connect to Home Assistant. Compared to Wifi, power requirements are much lower and so Bluetooth is good for battery-powered devices. They’re also more private, as they can’t easily be connected to from the wider internet.

However, Bluetooth has quite a limited range – it’s designed to be a ‘personal’ area network and won’t reach across large houses. You can use a Bluetooth Proxy in Home Assistant to extend the range, and whilst these devices are cheap, you’ll need to be comfortable flashing custom firmware and will usually need to plug them in as they bridge to Wifi. Like Wifi, it uses the 2.4 GHz band and so interference is possible – especially with the lower signal strength. Bluetooth connections also tend to be between two paired devices.

Zigbee

Zigbee is a mesh protocol, and it’s used by a number of smart home brands such as Philips Hue and Ikea Tradfri, as well as UK smart meters. This means that all devices on the same network talk to each other, and so a network with lots of devices could theoretically be quite strong. Like Bluetooth, there’s additional privacy as these devices aren’t connected directly to the internet like with Wifi. It’s also more energy efficient than Wifi, so battery-powered Zigbee devices will last longer between charges.

The key disadvantage of Zigbee is that you need a bridge to link it to your home network. Manufacturers like the aforementioned Philips and Ikea will sell you a hub that does this, although you can also buy USB dongles. Therefore, there’s a higher initial cost as you have to buy a hub as well as your devices. And it’s another 2.4 GHz protocol, so could have the same interference issues as Bluetooth and Wifi.

Whilst Home Assistant has good Zigbee support, both natively and through the Zigbee2MQTT system, if you don’t have a separate hub then getting these devices into Google Home can be a very involved process. Alexa is a little easier thanks to the Emulated Hue integration.

Thread

Thread is based on the same 802.16 standard as Zigbee, but differs in a couple of ways. Firstly, devices on a Thread network have an IPv6 address. Secondly, Thread is a simpler protocol that focuses just on being a mesh network with Matter taking over the device APIs. The benefit of integrating with Matter is that, unlike Zigbee, you may not need a separate bridge for Thread devices. A number of smart speakers from Google, Amazon Alexa and Apple can also act as Thread Border Routers, so it’s possible that you’ll already have the infrastructure in place in your home for Thread devices. Like Zigbee, Thread is a mesh network, and by using Thread Border Routers, the devices have a degree of separation from the wider internet that should improve privacy and security.

The downside is that Thread is still pretty new, and so there aren’t many Thread devices out there yet. You may also find that each device that incorporates a Thread Border Router creates a separate Thread mesh network. Home Assistant can be configured to join a preferred network, but it can be a bit of a faff. Ideally, they should all make one big, strong mesh network across your home, but we’re not there yet. And, once again, we’re dealing with a 2.4 GHz protocol here.

Z-Wave

Z-Wave sets itself apart from the aforementioned protocols by being on the lower 800-900 MHz frequency range. These lower frequencies have a longer range, and so are more suited to larger homes, but also avoid the interference of the 2.4 GHz band. Like Zigbee, it’s a mesh network, and should have similar privacy and security benefits by not being connected directly to the internet.

This also means that Z-Wave has the same disadvantage as Zigbee in that you’ll need a bridge to expose these devices to your home network. Furthermore, Z-Wave devices tend to be more expensive, so the upfront cost is usually higher than other protocols mentioned here.

RF and Infrared

I’m including these for the sake of completeness, but they’re not ‘smart home protocols’ in the same way as the above. It’s possible to connect the likes of Home Assistant to bridge devices that can communicate over Wifi and 433 MHz RF or Infrared. These will typically be doorbells or remote controls for devices that don’t connect using any of the above. But setting them up can be trial and error, and involves detecting and interpreting codes to trigger automations.

If you’re building a smart home system, then a bridge may be useful to bring existing devices in that don’t support standard smart home protocols. But if you’re looking to buy new devices, stick with the ones above.

Displaying CPU temperature in Home Assistant

CPU temperature screenshot in Home Assistant

Earlier in the week, I mentioned that I’d bought a new case to keep my Raspberry Pi cool. So that I can keep an eye on the CPU temperature, and hope that it doesn’t overheat again, I’ve added this as a sensor in Home Assistant.

Adding a CPU temperature sensor to Home Assistant isn’t as straightforward as most other integrations. It’s not included in the System monitor integration, for example. When I was searching for solutions, I found all sorts, including one which required installing several packages from Aptitude, a script, and an MQTT broker. To be fair, that was designed to monitor multiple Raspberry Pis remotely; all I needed was just to poll the CPU temperature of the device that Home Assistant was running on.

Command line integration

Whilst not as straightforward as adding an integration, there is a relatively simple way of adding a CPU temperature sensor using the Command line integration. Indeed, it’s one of the given usage examples, which I’ve copied below:

# Example configuration.yaml entry
command_line:
  - sensor:
      name: CPU Temperature
      command: "cat /sys/class/thermal/thermal_zone0/temp"
      # If errors occur, make sure configuration file is encoded as UTF-8
      unit_of_measurement: "°C"
      value_template: "{{ value | multiply(0.001) | round(1) }}"

You’ll need to add this to your configuration.yaml file, and then restart Home Assistant. You should now have a ‘CPU Temperature’ entity, which you can add to a card to display on your home dashboard.

As well as running the command, the example code also adds the relevant units, and also reformats the numbers. If you open a terminal window and run the cat /sys/class/thermal/thermal_zone0/temp command on its own, you’ll get a value like ‘36511’. So, the value_template line divides the number by 1000 (or specifically multiplies it by 0.001, but the result is the same), and rounds it to one decimal place.

Once you’ve got the entity into Home Assistant, you can log your CPU temperature over time, and even display it as a graph if you want. You can also build automations, so that you can receive notifications when your CPU temperature is too high. For a Raspberry Pi, ‘too high’ is 85°C.

A temperature-controlled fan using Generic Thermostat in Home Assistant

A screenshot of the description of the generic thermostat integration in Home Assistant

So earlier this month, in my review of the ThermoPro Bluetooth Thermometer, I mentioned some ‘additional functionality’ in Home Assistant that I would write about. Well, later is now, and I’m going to talk about how I have a temperature-controlled fan in our bedroom, powered by Home Assistant and its Generic Thermostat integration.

Generic Thermostat is one of the older Home Assistant integrations, having been around for several years. It allows you to take any temperature sensor, and any smart switch, and automatically turn the switch on and off in response to temperature fluctuations. In essence, Home Assistant itself provides the thermostat functionality.

The switch should power something that can either heat up or cool down a space – for example, a plug-in heater, or an air-conditioning unit. In my case, I’ve hooked it up to a standard pedestal fan, and used a smart socket to turn the fan on or off at the plug.

Enabling the integration

Note: within days of publishing this blog post, Home Assistant 2024.7.1 was released, which allows you to configure the Generic Thermostat through the Lovelace UI, so you don’t need to add the YAML code anymore.

I mentioned that it’s an old integration, and sadly it’s not one that has been updated much since it was implemented. This means that you can’t add it using the Home Assistant interface (Lovelace), and instead you’ll need to add it to your configuration.yaml file.

Here’s mine:

# Generic thermostat
climate:
  - platform: generic_thermostat
    name: Bedroom thermostat
    heater: switch.bedroom_fan_socket
    target_sensor: sensor.tp357s_55ab_temperature
    min_temp: 15
    max_temp: 30
    ac_mode: true
    target_temp: 19
    cold_tolerance: 0.5
    hot_tolerance: 0.5
    min_cycle_duration:
      minutes: 20
    away_temp: 19
    precision: 0.1

Here’s what each variable refers to:

  • Platform specifies the integration, and the Name is the friendly name of the device.
  • Heater is the name of the entity that controls the smart socket that the fan is attached to.
  • Target_sensor is the name of the thermostat entity that provides the temperature.
  • Min_temp and Max_temp set the minimum and maximum temperatures that you’ll see on the Climate card in Lovelace – I’ve set these to 15°C and 30°C respectively.
  • AC_mode is set to ‘true’ because we’re using a device that’s supposed to cool down the room. If this were a heater, I would leave this line out.
  • Target_temp is the temperature that I want the thermostat to achieve, which is 19°C.
  • Cold_tolerance and Hot_tolerance mean that Home Assistant will only turn on the fan when the room reaches 19.5°C, and will only turn it off when it reaches 18.5°C.
  • Min_cycle_duration means that if Home Assistant turns the fan on, it should stay on for at least 20 minutes, and vice-versa, so it’s not constantly cycling on and off.
  • Precision is how much precision I want when setting the temperature; at 0.1, this means I can set it to 1/10th a degree.

Once you’ve added or amended the settings for your thermostat, you’ll need restart Home Assistant.

How it works in practice

So, once set up, if the temperature in our bedroom reaches 19.5°C, the fan will come on. It’ll then stay on until the room reaches 18.5°C, or 20 minutes, whichever happens first.

You can also control the thermostat like you would with, say, a Nest thermostat through Home Assistant. It will create an entity which you can add a card for on your dashboard. So, although you may have set a target temperature in the initial configuration, you can change this without editing your configuration file. However, if you re-start Home Assistant, it may forget this.

If you also use Google Assistant or Alexa, then you can also make them see and interact with your generic thermostat, if you have integrated these with Home Assistant.

Whilst I use a fan and a smart switch, if you have an air conditioning unit with an RF control, you could use an RF bridge to allow General Thermostat to control it.

Fans vs air conditioning

If you do use a fan with Generic Thermostat, you’ll notice that your fan may stay on for a long time. That’s because fans don’t actually cool the air; they move air around which helps sweat evaporate more quickly. That makes you cooler, but not the air around you. It’s a bit like a hot day at the seaside, where the breeze takes the edge off the heat.

Air conditioning systems actually cool the air down, but are much more expensive and need an outlet for the hot air to be pumped out. Most British homes don’t have air conditioning, including ours – most of the year, it’s too cold, and our houses are designed to retain heat.

ThermoPro TP357 Bluetooth thermometer review

A photo of a ThermoPro TP357 thermometer showing the current temperature of 17.5℃ and humidity of 59% on a LCD display.

I have an upcoming project for Home Assistant which means that I need to be able to measure the temperature in our bedroom. As part of this, I’ve bought a couple of ThermoPro TP357 Bluetooth thermometers from Amazon (sponsored link). One is for our bedroom, and the other is for our eight-year-old’s bedroom which tends to get a bit cold in winter.

I specifically went for these thermometers because they’re:

  • Cheap – I paid £19 for the pair last week, but they’re £16 for the pair as I write this.
  • Supported by Home Assistantthere’s an official integration.
  • No extra hardware required – because they’re Bluetooth, and I run Home Assistant on a Raspberry Pi with a supported Bluetooth chip, there’s no additional hardware required to get the two to talk to each other.
  • Probably good battery life – Bluetooth is quite energy efficient when compared with, say, Wifi, and so the batteries should last longer.
  • No need to use the cloud – all the data can be stored locally on Home Assistant.

ThermoPro TP357 look and feel

The ThermoPro units are smaller than I expected. They’re about as tall as a credit card but roughly square, so they’re narrower than a credit card. Each one runs on one AAA battery which is provided. On the back is a flip out kick-stand, a magnet and a hook, so you can wall-mount it, stick it to your fridge or have it free-standing on a shelf like I do. There’s also a button on the back that switches it between Fahrenheit and Celsius.

On the front, there’s an LCD screen which shows the current temperature and humidity level. There’s also a face pictogram – it’ll smile when the humidity is between 30-60%, frown when it’s less than 30% or show a neutral expression if it’s over 60%.

Home Assistant integration

If you have Bluetooth enabled on your Home Assistant device, then a few minutes after you put the battery in, Home Assistant should pop up a notification to say it’s discovered a new ThermoPro device. You’ll just need to confirm that you want to set it up and allocate it to an area, and you’re done.

As you would expect, the ThemoPro integration reveals entities for temperature and humidity, but also the battery level. I’m not sure how accurate this is, as both provided AAA batteries just show 50%. I’ve added these to my Home Assistant dashboard, and have set up some additional functionality that I’ll blog about later. Mainly because, despite allegedly being ‘summer’ in the UK right now, it’s not been warm enough for me to test.

The range seems quite good on these. ThermoPro claim that there’s an 80 metre range in direct line of sight. There’s a few thick walls between my Home Assistant device and the thermostats, and one that is around 5 metres away doesn’t have great signal strength but it’s enough.

ThermoPro app

Of course, ThermoPro expect you to use their app for iOS and Android. This includes logging of up to a year’s data, and you can set notifications based on events related to the humidity and temperature. Well, that’s what it says – I haven’t actually installed the app. I’m not yet sure if it’s possible to have the app and Home Assistant communicate with the thermostat at the same time. But theoretically, anything the app can do, Home Assistant can do too.

Alternatives

I’ve had various Facebook adverts for alternatives to these. Some have e-ink displays, which are more readable at a distance, or use different protocols to Bluetooth. But they’re all more expensive. These two seem to do the job well and are small and cheap. Plus, it should be quite a while until I need to replace the batteries.

Home Assistant and Google Home broadcasts

Screenshot of Home Assistant showing a script to broadcast a message via Google Home when my washing machine finishes

We have six Google Home Mini devices around our home, and now I can get Home Assistant to automatically deliver broadcast messages. Here’s how I did it.

Broadcast messages

When you have more than one Google Home device, you can say ‘Okay Google, broadcast [message]’, and it will relay that message to all of the other Google Home devices in your home. It’s useful for announcing that dinner’s ready, for example. Our house is long, rather than square, and I’m hard of hearing, so we use this quite a lot.

What I wanted to achieve was automation of these broadcasts, so that a broadcast was triggered by an event. This is possible thanks to the Google Assistant SDK integration. It’s a bit of a faff to set up – I recommend following this guide or watching the video embedded below:

Call the service

Once it’s set up, you can test it by opening Home Assistant’s Developer Tools. Click the ‘Service’ tab, and choose the ‘Google Assistant SDK: Send text command’ service. In the command, type something like ‘broadcast "This is a test"‘ and click ‘Call Service’. If you’ve set everything up correctly, your Google Home devices should all say something like “Incoming broadcast; it says: This is a test”.

Create a script

As I write this, the latest version of Home Assistant (2024.4.x) doesn’t allow automations to call services directly. So, to be able to trigger the broadcast, we’ll first need to create a Script in Home Assistant. In my example, I have a script called ‘Washing machine finished broadcast’. The ‘mode’ is left at the default setting of ‘Single’, and then I’ve created an Action which is to Call a Service. As above, I have selected ‘Google Assistant SDK: Send text command’ as the service to call, and then entered ‘broadcast "The washing machine has finished"‘ as the command, which I have ticked. I’ve left the rest blank.

Whilst here, I’ve also added a time condition. As this will be triggered when the washing machine finishes, I don’t want it to run when we might be asleep. We have Google Home devices in each of the bedrooms, and we sometimes run the washing machine overnight.

Home Assistant runs script actions in order. So, if you also want to add a time condition, you’ll need to add this before the Google Assistant SDK service call, or re-order the actions. In this example, I have created a Test action, where the current time is between 8am and 8pm. Outside of those times, the script will fail and not process the next command, so the broadcast action won’t be executed.

Link it to an automation

Now that we have a script, we can integrate this with an automation. I’m using my existing automation that sends a phone notification when my washing machine finishes. In my case, this is triggered using Meross energy monitoring smart plugs (sponsored link).

So now, as well as sending a notification, it also triggers a broadcast (within the time constraints).

Other things you can do with Google Home

Once you have the Google Asssistant SDK integration installed in Home Assistant, you can use scripts to run any other command that you would say to Google Home. You could, for example, create a button on your Home Assistant dashboard, which triggers the text command ‘play Never Going To Give You Up by Rick Astley on Spotify‘ if you want to automatically rickroll the other occupants of your house. It can also control smart home devices which work with Google Assistant, but do not yet have a Home Assistant integration.

The advantages of a smart home

An AI generated image of a house, with a giant light bulb floating above it that has a depiction of Albert Einstein

Okay, so it’s fair to say that I write a lot about Home Assistant and the smart home – I have a whole category of blog posts about it. Whilst it’s probably a sign of a mid-life crisis project, I thought I would set out the advantages of having smart devices at home, as a justification of why I spend so much time setting and configuring devices.

Delayed start

Many devices, like washing machines, dishwashers and the like, offer a delayed start facility. If you need to wash clothes, but are out at work all day, you probably want your washing machine to finish just before you get home. Otherwise, you’ll have wet clothes sat there for several hours. Similarly, we have a bread maker that we set to finish at around 4am, so that the bread is still fresh but not too hot when we need it.

I also use a delayed start on our dishwasher, so that, in winter, it runs during the middle of the day when there’s more sunlight. That allows us to make the best use of the cheap energy from our solar panels. This may also be useful for people whose electricity tariffs vary at different times, such as the Octopus Agile tariff.

Not all devices offer a delayed start feature as standard, so smart plugs can fill this role. I also use a smart plug to turn off a device that lacks a timer.

Remote control

The first smart device that we got in our house was a Nest thermostat, and this allows us to control our heating whilst outside the home. That means that we can ensure the heating is off when we’re away, saving money, but also ensure that it comes back on before we get back home.

Even when we’re at home, we have a couple of standing lamps in hard-to-reach places – smart plugs allow us to use voice control to turn these on and off.

Dashboard overview

As Home Assistant supports more devices than most other platforms, I can have a very powerful dashboard that brings in data from every smart device in the home (and some outside data too). That way, I can see at a glance whether the TV, dishwasher, washing machine and tumble dryer are on, as well as control several lights and the various Google Home speakers around the house. This is also possible in other apps like the Google Home app, but with a more limited range of devices.

Notifications

Through Home Assistant’s automations, I can create notifications for things happening in my home. For example, although our washing machine beeps loudly when done, it’s in the cellar. Combined with my hearing loss, I might not hear it when in another part of the house. So having a message pop on my phone to say that the washing is done is very helpful.

Logging

Home Assistant in particular has a useful logging feature, so it can automatically log when devices are turned on/off or change state. So if you can’t remember when a device was last used, Home Assistant can tell you.

Quick access to information

We have Google Home smart speakers in almost every room (not the bathrooms). They’re great for asking quick questions about things like the weather, without needing to look it up on a phone or computer. We also use them extensively for setting timers and alarms, and for playing music. And having them across the house means that we can use broadcast messages – again, better than shouting for someone like me who sometimes struggles to hear.

There are other advantages that I don’t have personal experience of; a colleague has a smart doorbell and smart lock, so that if someone tries to deliver a package and no-one’s home, it’s possible to remotely open a door into the porch to allow the delivery driver to leave it securely. We don’t have a smart doorbell or smart lock – or a porch for that matter. We also don’t have a garage, but having a smart garage door opener would be good if we did have one.

Meross energy monitoring smart plugs

A photo of a Meross energy monitoring smart plug in a UK plug socket

I’ve recently bought a pair of Meross energy monitoring smart plugs (sponsored link), and by integrating these with Home Assistant, I now get notifications when the washing machine and tumble dryer have finished.

Previously, I’ve used Tuya smart plugs. Which are fine, but these ones don’t do energy monitoring, don’t work with Apple HomeKit and I have some privacy concerns. The Meross plugs, on the other hand, do offer energy monitoring, can be used with 13 Amp devices, and also work with Matter. They’re also smaller, and feel more solidly built than the older Tuya plugs.

Matter support

These smart plugs also support Matter, the open smart home standard. This should mean that you can use them with any smart home ecosystem, whether that’s Amazon, Google, Apple HomeKit, Samsung SmartThings or Home Assistant. I was able to get them to pair with Home Assistant, but not with HomeKit. It turns out I need a device that can act as a HomeKit hub, which can be a permanently plugged-in iPad, Apple TV or Apple HomePod. It won’t just use any other Matter server on my home network. This is ironic as the Home Assistant app uses the same Matter provisioning process on iOS devices.

It’s also worth noting that Matter support is limited to turning the smart plugs on and off. I’m guessing the Matter specification doesn’t include energy monitoring as yet. Also, these smart plugs connect over 2.4 Ghz Wifi, which is worth noting if you’ve configured your Wifi network to only use 5 GHz. They don’t use Thread.

Screenshot of the hassio_appliance-status-monitor Blueprint being configured as an automation in Home Assistant

Making use of energy monitoring

If you want to take advantage of the energy monitoring capabilities of the smart plugs, you’ll either need the official Meross app (for iOS and Android), or use Home Assistant. Whilst I have installed the Meross app, I’ve set up the automations in Home Assistant. There isn’t an official Home Assistant integration for Meross, so you’ll need to install the Meross LAN custom integration which is available through HACS.

Once you’ve set it up and added your devices, you’ll need to set up the energy monitoring automation. By far the easiest way is to use this BlueprintBlueprints are essentially templates for automations that you can download and configure. Make sure you follow the instructions, as you’ll need to create four Helpers for each smart plug, and give them specific names.

You can then define actions to take when the energy monitoring detects the appliance has started and ended. In my case, I’ve told it to send a notification to my phone when the device has finished. In the case of my tumble dryer, this includes a 15 minute delay as it uses less power towards the end (and otherwise results in notification spam). You may need to tweak the power thresholds as well. If all goes well, then you’ll get a notification like the one in the screenshot below.

A screenshot of a notification from Home Assistant stating that the washing machine has finished, triggered by the energy monitoring smart plugs

Doing this means that you can get one of the key features of a smart device, without paying a significant premium. I paid £25 for the two plugs from Amazon, whereas it would have cost at least another £100 to buy a smart tumble dryer. Our washing machine is 9 years old and I’m not even sure that smart washing machines were on the market at the time.