If you have several devices of the same type, and want to be able to control them all together, then it’s possible to group them together in Home Assistant. The integration is simply called ‘Group‘, and once configured, it creates a helper entity that will perform the same action on all grouped devices.
Last year, I picked up two Zigbee colour-changing LED strips from AliExpress. One was to go in our nine-year-old’s bedroom and the other in the living room – the idea being that we could set the colours depending on the time of year. Rather than having Christmas lights that we put up in December, and took down in January, these lights could stay up all year round. For example, they could be pink around Valentines Day, or green at Halloween.
That was the theory. However, despite ordering 3 metre long strips, they were too short. Our house is about 100 years old with tall ceilings, and consequently, tall windows. In the end, two LED strips together, totalling 6 metres, were long enough just for one window and so they’re both in our nine-year-old’s bedroom. Because they’re two separate strips, they appear and work as separate Zigbee devices.
Creating a group in Home Assistant
You can start the process of creating a group either on the Integrations or Helper screens of Home Assistant’s settings. First of all, Home Assistant will ask you what type of devices you are grouping – all the devices must be of the same type, so you can’t group a switch and a light together.
Well, actually you can – but first you need to create a ‘Change Device Type of a Switch’ helper. Say you have a smart plug controlling a light; you can then create a Helper that appears as a Light, and then that can be grouped with other lights.
Anyway, in my example, I selected Light, gave it a name, and then selected the entities that needed to belong to the group – i.e. the individual lights. There’s also a ‘Hide Members’ option, which will hide the devices you’ve selected from the list of entities in Home Assistant. If you’ll only ever want to interact with the lights as a group, then tick this. However, if you still want to be able to manage individual lights as well, then keep it unticked.
On my Home Assistant dashboard, the icon shows that the new group helper is for multiple lights. The good news is that, even with colour changing lights, all the lights in the group will respond the same way together once grouped.
I also make these lights available in Apple Home and Google Home, and again, I make sure that Home Assistant is exposing the group, rather than the individual lights. As such, when I use Google Assistant to turn them on and change the colour, both lights change simultaneously.
Being able to access your Home Assistant instance outside of your home is useful, and there are many ways to do it – I’ve used several, including SWAG, an nginx proxy and more recently Nginx Proxy Manager. Today, I’m reviewing Homeway, a third-party service.
Setting up Homeway
Of all of the ways that you can enable remote access to Home Assistant, Homeway is one of the easiest. You sign up for an account on the Homeway web site, install an addon on your Home Assistant instance, and then you should be ready to go. Setting up the Home Assistant Companion App for iOS and Android is also supported, albeit with a little more work. If you don’t run Home Assistant OS or Supervised, and can’t install addons, then there’s also a Docker image or CLI client you can install.
Once up and running, it works well – you log in first to Homeway, and then into your local Home Assistant instance. It’s all done over SSL, without needing to set up DNS, port forwarding or reverse proxies.
Homeway also supports easy integration with Google Assistant and Amazon Alexa. Having done it myself, setting up Google Assistant manually is a chore, and even when it’s up and running, I found it slow and unreliable. Using Google Assistant this way is much easier, as you don’t need to create a developer account. I also found it to be much faster, and I haven’t had any issues with devices showing as offline.
If you want to use Home Assistant’s voice control feature, then Homeway also provides access to an AI large language model for processing commands. Its chatbot is called Sage, and behind the scenes it uses ChatGPT 4 and Anthropic’s Claude services. For speech-to-text, it can also call on Google Gemini and DeepSeek R1, and there’s a choice of 25 voices from the various services it uses. As I use Google Assistant, I haven’t set this up myself.
What about Home Assistant Cloud?
What Homeway offers is very similar to Home Assistant Cloud. Home Assistant Cloud is provided by Nabu Casa, who employ many of Home Assistant’s developers and support the Open Home Foundation. So why should one use Homeway instead of Home Assistant Cloud?
The answer is price. I’ve compared the prices in a table:
Monthly price
Annual price
Home Assistant Cloud
£6.50
£65
Homeway
£3.49
£29.88
As you can see, Homeway is less than half the price of Nabu Casa’s Home Assistant Cloud. And, it should be noted that Homeway offers a free tier, if you just want remote access, albeit with data limits. You only need to pay for heavy usage and Google Assistant/Alexa access. There isn’t a free or lower-priced tier for Home Assistant Cloud.
That being said, as of January, Home Assistant Cloud now includes backup storage as well, which Homeway doesn’t currently offer. It’s also worth reiterating that some of the money from Home Assistant Cloud subscriptions goes to paying staff to work on Home Assistant development. As such, Homeway is a little controversial, and I noted that the Home Assistant Community on Reddit seems to block the word ‘homeway’ from posts.
For me, the best feature about Homeway is the Google Assistant support, which works well. I already have good remote access set up using Nginx Proxy Manager and will continue to use this.
I recently bought a pair of Onvis Matter Smart Plugs(sponsored link), as my first foray into smart devices that use a Thread network rather than Wi-Fi. These were to replace my remaining Tuya smart plugs, which use Wi-Fi.
I’m going to review the Onvis smart plugs, and talk about why I’ve chosen Matter and Thread smart plugs over Wi-Fi or Zigbee.
Why not Tuya?
I bought my Tuya smart plugs several years ago, when I didn’t know so much about smart home technologies. At the time, we’d only recently got a Google Home Mini, and so I picked up a cheap smart plug which happened to support Google Assistant and IFTTT, as well as Alexa. The other advantage of Tuya devices was that they could work without buying a hub as a controller, unlike Zigbee-based devices from the likes of Philips and Ikea. Bearing in mind that the hubs often cost at least £40, it’s a lot for when you just want one plug.
I wouldn’t buy a new Tuya Wi-Fi device nowadays, for the following reasons:
Wi-Fi devices use more power than others (Zigbee and Thread). Whilst we’re talking single digit numbers of watts here, having lots of Wi-Fi smart plugs around your home adds to your home’s ‘base load’ (sometimes known as a ‘phantom load’) of always on devices.
Tuya devices rely on Tuya’s servers to work. I understand that users based in Europe use servers located in Europe, but it means that every request has to make a round trip to their servers. This makes it slower than a system where commands can be actioned locally. Now, millions of Tuya devices have been sold over the years and I doubt that those servers would ever go offline, but if they did, any Tuya devices would lose their smart abilities.
Tuya is a Chinese company, so theoretically someone in the Chinese government could be logging every time you use a Tuya device. It’s a theoretical risk, but not having that data pinging across the internet in the first place is better for privacy.
The Tuya plugs that I have are also quite big, and not very sturdy.
Getting started with Thread
To use Thread devices, you need a Thread Border Router. Thankfully, I already have two, as they’re built into my Google Nest Wifi devices. You may also already have a Thread Border Router if you have some of the newer Google Nest Hub devices, a newer AppleTV or Apple HomePod, a newer Alexa device or a Samsung SmartThings Hub.
If you use Home Assistant, you can flash a Zigbee dongle to use Thread instead. Note that the blog post mentions enabling a ‘multi-protocol’ mode that allows you to use both Zigbee and Thread on the same dongle, but this isn’t recommended. As it is, my dongle just runs Zigbee nowadays but I may get a second dongle that I can flash Thread firmware onto. That way, Home Assistant has its own Thread Border Router, and it expands the Thread mesh network. Until then, Home Assistant is able to use the existing Thread mesh network that my Google Nest Wifi devices created – see How to join a preferred Thread network in Home Assistant for more.
Commissioning the Onvis smart plugs
When you get a new Matter device, it needs to be ‘commissioned’ to add it to your home network. You need to open the app for the smart home ecosystem you want to add it to (for example, Google Home, Apple Home or Home Assistant), select to add a new Matter device, and then scan a QR code on a label on the side of the device. In the case of these Onvis smart plugs, you also need to hold down the button for around 15 seconds to put them into commissioning mode. It helps to read the manual.
One of the reasons that I use smart plugs is that they’re controlling devices in awkward places, so I commissioned this in a place where I could sit comfortably with the devices plugged in, and then moved them to where they need to be. Otherwise, I’d be spending time crouched awkwardly in a corner.
Once commissioned, the Onvis plug will show up in the smart home app of your choice, and you’re done. I’ve been using them for a couple of days, and they seem to work well.
Why Matter and Thread?
So I’ve outlined why I wouldn’t use a Tuya device, but why have I chosen a device that uses Matter and Thread?
Thread devices only work locally. Whilst voice assistants like OK Google and Alexa may still need to use the internet to interpret what you say, they don’t need to send the actual commands across the internet. As well as protecting your privacy, it’s also faster; these Onvis Thread plugs seem to respond almost instantly, rather than at least half a second with the Tuya plugs.
The majority of Tuya devices do not work with Apple Home. This isn’t a massive problem for me, as although I use an iPhone and an iPad, I’m not a big Siri user. However, Matter devices are supported.
The idle power usage of these plugs should be lower than Wi-Fi.
As Thread is a mesh network, the more devices you add, the stronger the network becomes. It can also have multiple Thread Border Routers as exit points to your LAN/Wi-Fi network, so a network with several Thread devices and Border Routers should be very resilient.
Many of Apple’s newer iPhones (iPhone 15 and later), iPads and MacBooks include Thread radios, offering even more resilience if they’re connected to your Thread mesh network when at home.
I also think Matter is the future, although it’s taking longer than I would have anticipated for Matter devices to become mainstream.
It should be noted that these Onvis smart plugs do not support energy monitoring. They simply turn a socket on and off. Obviously, you can use automations in your choice of smart home ecosystems to set timers, or trigger them to turn on and off in relation to external events.
I’m noting this because it seems to be a common issue with these relatively early Matter devices – their Matter support is basic. With the Meross smart plugs for example, the Matter support is also limited to turning them on and off again. If you want to use their energy monitoring abilities, you have to use the Meross app, or install the Meross LAN integration from HACS for Home Assistant. These don’t use Matter and instead rely on Meross’ servers to send and receive data.
Price
I recently picked up a Zigbee smart plug for around £8 (including VAT) from AliExpress, which included energy monitoring. Seeing as these Onvis smart plugs don’t support energy monitoring, you may be surprised to find that they’re £25 each, or £40 for a pair (although as I write this, there are 15% off vouchers available on Amazon). So they are on the pricey side.
Which brings to the question about why I’m not just using Zigbee. After all, Zigbee is also a mesh network, and devices work locally. As it is, I have a small Zigbee network with the smart plug and a couple of colour-changing lights for our nine-year-old’s bedroom. And they work fine with Home Assistant. But then I have to use Home Assistant to make them appear in Google Home, and allow my Google Assistant devices to talk to them. Command fulfilment can be slow, taking a few seconds, and it’s unreliable – even when the Zigbee devices are obviously working, Google sometimes complains that they’re offline.
I suppose I could buy a Zigbee hub, like a Philips Hue or Ikea Dirigera, which would probably work better. But I already have Thread Border Router devices, and I’m hoping that Matter will mature as a standard.
Is £25 per Onvis plug worth it? Well, that’s up to you – but bear in mind that they work without needing a third-party app, will work with most smart home ecosystems, seem nice and sturdy and don’t rely on third-party internet servers. Hopefully, these Onvis smart plugs will be a good, long-term investment.
It’s also worth noting that these were the only Thread smart plugs that I could find on Amazon UK.
Matter Multi-Fabrics
One last thing to mention about Matter is its ‘multi-fabric’ feature, which allows you to add devices to multiple smart home ecosystems simultaneously. Initially, I’ve added all my Matter devices to Home Assistant, which has the Python Matter Server addon. On the device settings page, there’s a ‘Share Device’ button, which, when clicked, puts your device back into commissioning mode. You then get a new QR code in the Home Assistant interface, which you can use to add it to another smart home app like Google Home. You can then repeat the whole process for any other apps, like Apple Home.
This means that I have my Onvis smart plugs added to all three smart home apps, and they can be controlled by Home Assistant, Apple Home and Google Home. What’s particularly notable is that I was still able to control the lights in Apple Home whilst my Raspberry Pi running Home Assistant was restarting after an update.
Summary
Well, this ended up being a longer blog post that I’d expected. So, in summary:
The Onvis smart plugs work well, are sturdy, respond quickly and are compatible with most smart home ecosystems
They’re a bit pricey at £25 each, and don’t support energy monitoring
You need a Thread Border Router device for them to work, but you may already have one
They’re more energy efficient than Wi-Fi sockets, and don’t rely on third-party internet servers
Recently, I’ve been reading about Dave2‘s adventures with his new Homey Pro, which he is using as his smart home controller. For context, Dave2 has tried to use devices certified for Apple HomeKit for years, and it’s been a struggle. Devices disappear randomly, automations fail to work, and so on.
The Homey Pro is an all-in-one smart home controller, supporting Zigbee, Matter, Z-Wave, Bluetooth, Wi-Fi (and optionally Ethernet), Infrared and RF devices, in one neat package. That’s basically every smart home protocol covered. There’s also the Homey Bridge, which is available separately to increase range, but it can also be bought separately.
Dave2 has written five blog posts about his journey: part one, part two, part three, part four and part five. If you’re considering buying a Homey Pro, I would suggest reading each one – especially if you’re moving away from Apple HomeKit.
How does the Homey Pro compare to Home Assistant?
As regular readers will know, I’ve basically gone all in on Home Assistant as a smart home controller. It works fine for me, and I like its do-it-yourself nature up to a point. Where Homey stands out is that everything is in one box, and, as far as I can tell, you don’t need to sign up for developer accounts to integrate services. That removes a large amount of friction which can be intimidating to new users. Home Assistant Cloud makes integration with Google Assistant and Alexa much easier, but it’s a paid add-on.
However, where Home Assistant stands out compared to Homey Pro is the number of integrations. Homey Pro offers a good range of apps, and has an open SDK. But there isn’t the same range as Home Assistant, and there doesn’t appear to be the equivalent of HACS to install additional integrations.
Whether Home Assistant or Homey Pro is right for you depends on how much time you have, and how much control you want. The Homey Pro will work much better out of the box, and it should be quicker and easier to get started with it. Home Assistant is definitely more complicated, even if you buy a device with the software pre-loaded, but it’s much more powerful and customisable.
If you’re a Home Assistant user who is getting started with Zigbee devices, then you may be tempted to just use Zigbee Home Automation (ZHA), Home Assistant’s built-in Zigbee implementation. But you may also want to consider Zigbee2MQTT as an alternative, and this blog post will explain the differences.
Low power, so battery-powered Zigbee devices shouldn’t need their batteries replacing too often.
It’s a mesh protocol, so every mains-powered Zigbee device forms a mesh with each other, allowing a network to span a house without necessarily needing multiple access points like Wi-Fi.
It works locally, so it’s more secure and private than Wi-Fi.
If you’re new to Zigbee and/or Home Assistant, my recommendation is to use ZHA, which is Home Assistant’s built-in implementation. If you plug your Zigbee dongle in, Home Assistant should detect it, and offer to configure the ZHA integration for you. Then, you just add devices using the ‘Add Integrations’ button on the Integrations Settings page, where a new ‘Add Zigbee device’ option will appear at the top.
Home Assistant should be able to recognise and offer to add any Zigbee device, but what you may find is that some devices won’t have any entities. This means that it’s not supported by ZHA. There’s a database of Zigbee devices which you can use to check whether they’re supported by ZHA or Zigbee2MQTT, and what you may notice is that there are quite a few which ZHA doesn’t support.
Zigbee2MQTT
One of the devices that I’ve recently bought seemingly fell into this latter category. To be fair, I never checked it with ZHA, but reading reviews online suggested that it would only work with Zigbee2MQTT and not ZHA. Zigbee2MQTT also maintains its own list of supported devices, which currently number nearly 4000.
Getting Zigbee2MQTT set up with Home Assistant is a much more involved process, however. You’ll need to install two addons and an integration:
Firstly, you’ll need to install the Mosquitto addon, which is an MQTT broker – essentially a server which handles the MQTT messages. This is available from the standard Home Assistant add-on store. There are other brokers available, but this one is most recommended for use with Home Assistant.
Next, you’ll need to install the MQTT integration. Once Mosquitto is running, Home Assistant may automatically detect it, and offer to install this for you, but if not you’ll need to install it manually.
Finally, there’s the Zigbee2MQTT addon to install. This isn’t available from the standard Home Assistant add-on store until you add a custom repository.
Once all of these are installed, you’ll need to disable the ZHA integration if it’s enabled, and then open the Zigbee2MQTT web interface. Go into the settings, and ensure that it’s pointing at the Mosquitto MQTT server that you set up in step one above – you may need to enter its IP address.
You’ll then need to add devices using the Zigbee2MQTT web interface – there’s a button at the top right where you can enable pairing. Any devices you add will then show up automatically under the MQTT integration in Home Assistant.
Once set up, Zigbee2MQTT seems to work well, and I’ve seen others state that they’ve found it more stable than ZHA. But it’s a lot more difficult to set up, and ZHA will probably work for most users. If you’re new to all this, my advice would be to try ZHA first, and then re-pair your devices with Zigbee2MQTT if it doesn’t work out.
If you’ve been reading this blog for a while, you’ll know that we have solar panels which are connected to an inverter from the Chinese company Solax. Recently, I asked for the firmware on our inverter to be updated, as part of some testing I’m assisting with for an app. Unfortunately, in doing so, it’s broken the Home Assistant integration.
As per the integration page:
Inverter models with newer firmware (and also those using devices like PocketWifi) no longer expose an API when connected to your wireless network, they do however continue to expose it on their own broadcasted SSID. To use this sensor in this case it is necessary to set up a reverse proxy with something like NGINX and use a Raspberry Pi (or similar) with two network connections (one being Wi-Fi that connects to the inverters SSID).
Sure enough, a scan of available Wi-fi networks showed a new unsecured SSID with my inverter’s serial number. Now I’m not beyond setting up a reverse proxy (I have Nginx Proxy Manager running) but this would require purchasing an additional Raspberry Pi, potentially with an additional USB Wi-fi adaptor or HomePlug adaptor.
Annoyingly, the inverter does still connect to my home Wi-fi network, and it’s possible to access a web-based portal by popping the inverter’s IP address into a web browser. But it no longer offers a local, real-time API over REST.
All aboard the Modbus
That’s the bad news. The good news is that it’s still possible to connect to the inverter using the Modbus protocol. Now, Modbus is old. Like, really old. Like, older than me old. Like, old enough to be a grandfather old. Like… well, you get the picture – it was originally developed in 1979 for use over serial connections. Thankfully Modbus can also work over TCP/IP on port 502, so I don’t need to run a very long serial cable and dig out my old USB to RS232 adaptor. Yes, I still have a USB to RS232 adaptor somewhere. I’m only a few years younger than Modbus.
Also, Modbus sounds like a bus full of really cool people wearing 1960s fashion and listening to The Who, although arguably they should be on Lambretta scooters. This is where I would ask Microsoft Copilot to create an image of this, but I’ll probably end up using the equivalent electricity to power a provincial English town trying to get it to generate what I’ve pictured in my mind.
Home Assistant natively supports Modbus, and if you have a spare half hour you can read everything on that page. Suffice to say, you have to set it up using YAML and know the Modbus specification of the device you’re communicating with. You probably don’t want to do this.
HACS to the rescue
The good news is that there’s a HACS integration for Solax Modbus. Once you have HACS installed, search for Solax and it’s (currently) the only one that comes up. Install it, restart Home Assistant, and then add the integration. There will be lots of input boxes pre-filled with default values – leave these be. The only thing you need to enter is the IP address for your inverter.
Once set up, the integration added loads of new entities for my inverter to Home Assistant. In fact, it seems like there were far more than before. The data isn’t strictly speaking ‘real-time’, but it polls every 15 seconds and so might as well be.
So that’s the good news. You can have the latest firmware on your inverter, and have it work locally with Home Assistant, without having to purchase another device to act as a reverse proxy. The bad news is that you’ll need to update any dashboards that you have set up to point to the new entities.
Looking to the cloud
The official way of accessing your inverter’s data and status is using the Solax Cloud, either online or through the official app. From there, there is an official API for interacting with this data. But it’s not real-time – updates happen every five minutes. And I can see why some people won’t want their data uploading to the cloud.
There isn’t a Home Assistant integration for Solax Cloud, either in the core product or through HACS. But someone has written their own YAML code to communicate with the Cloud API, should you wish to use this, although it also relies on the REST API which seems to have been deprecated from newer firmware versions.
Getting the latest Solax firmware
If you do want to update the firmware on your Solax inverter, there’s a handy guide here. The easiest and safest way is to contact Solax support and ask them to do it for you; they can log into your inverter remotely and run the upgrade. I hadn’t realised this until Home Assistant suddenly stopped being able to communicate with the REST API on my inverter. There are other ways of obtaining the firmware, and you can upload it yourself to your inverter’s local web portal, but it’s probably best for Solax to do this for you. Considering our solar panels, battery and inverter cost a five figure sum to install, it’s not something that I want to accidentally brick.
As for the app I mentioned in the first paragraph? I’ll talk about it once it’s released.
Last week, I wrote about HACS, the Home Assistant Community Store, which allows many additional community-provided integrations to be installed into Home Assistant. This week, I’m going to list those that I use.
DVLA Vehicle Enquiry Service
The DVLA Vehicle Enquiry Service allows you to monitor the publicly-available data about any UK car. When you set up the integration, you input a registration number, and it’ll download the data from the DVLA’s database. This includes useful information like when the car’s MOT is due, or when the car tax expires – these can be automatically added to a calendar widget on your Home Assistant dashboard.
HASS Agent
The HASS Agent integration allows you to use HASS Agent, a Windows desktop utility for managing Home Assistant. Once set up, you can configure automations to shut down your Windows computer, receive notifications, or monitor its state.
Nest Protect
We have a Nest Protect smart smoke alarm, which isn’t supported by the built-in Nest integration in Home Assistant. Google hasn’t made a public API for it, and so to integrate it with Home Assistant, you need to use this HACS integration. This is a good example of why an integration is in HACS and not Home Assistant core; setting it up requires you to log in to your Nest account in a private window, and then use Google Chrome’s developer tools to essentially ‘steal’ the cookies so that Home Assistant can hijack the same browser session.
Google has talked about adding the Nest Protect to its Google Home app for years, meaning that the standalone Nest app can be retired. But it hasn’t happened yet. When it does, perhaps there will be a proper API, and this will be available in Home Assistant core.
Timer Bar Card
This is a new card for your dashboard, which creates a progress bar for sensors that have a countdown. I use this for our Bosch dishwasher, so that as well as showing how long it has left, it shows visually how complete the washing cycle is.
Meross LAN
We have a pair of Meross energy monitoring smart plugs, and although they support Matter, to be able to do more than just turn them on and off, I need to use the Meross LAN integration. It supports both HTTP and MQTT communication, and will work both using Meross’ cloud MQTT servers and your own local MQTT broker, if you have one. Once set up, you can use the energy monitoring sensors in Home Assistant.
Octopus Energy
We get our gas and electricity from Octopus Energy (referral link, you’ll get £50 off your first bill if you sign up), and they have an API that any customer can use. The Octopus Home Asssitant integration lets you bring your meter data into Home Assistant, and you can set up automations to opt you in automatically to any energy saving sessions. The data is updated daily, unless you have a Octopus Home Mini which can provide realtime data for electricity, and half-hourly data for gas.
As well as offering some of the best unit rates for energy export, the fact that Octopus offers an API means that just about every UK geek that I know uses them. They also seem a lot easier to deal with than other energy suppliers we’ve used in the past.
HACS stands for ‘Home Assistant Community Store’, and it allows you to download and install custom components from the wider Home Assistant community. It’ll also keep them updated for you. Home Assistant has long supported so-called ‘custom components’, which allows functionality beyond the standard built-in integrations, but HACS makes finding, installing and updating these much easier.
A couple of weeks ago, version 2.0 of HACS was released. This includes a new addon for those using Home Assistant Operating System or Supervised mode, which makes it easier to install. Updates are now handled via Cloudflare for improved performance.
As well as additional integrations, HACS also allows you to install different cards for your dashboards, and different themes. For example, Mushroom is a set of replacement cards which some prefer the look of.
Compared to the built-in integrations, which are maintained by the Home Assistant project, those in HACS are maintained by the community. This means that they may not be tested as rigorously as the official integrations, and so it’s important that you have regular backups in case things go wrong. Also, expect more bugs.
As for why integrations are only in HACS and not Home Assistant itself, there are a few reasons:
It’s a niche service that may only apply to one country, or is of limited wider use.
It uses scraping – this is where there isn’t a publicly available API for the service and so it scrapes the contents of web pages to work. These aren’t permitted in core Home Assistant integrations.
It’s still in active development and not ready to be merged into the main Home Assistant release.
It duplicates the functionality of a core Home Assistant integration but does so in a different way.
I’m currently using eight custom integrations through HACS, and I’ll discuss these in a later blog post. If you’re a Home Assistant user and haven’t already checked out HACS, have a look to see if you can extend its features even further.
My latest Home Assistant project has been creating a Bluetooth Proxy – a device that essentially extends the range of my Raspberry Pi’s Bluetooth signal. To do this, I’ve purchased a small device with a ESP32 chip on, and flashed it with firmware from ESPHome.
Okay, so that introduction has a lot of jargon. Allow me to break it down a little.
What is a Bluetooth proxy?
Because Bluetooth connections are point-to-point, you can’t use range extenders like you can with Wifi, Zigbee and Thread networks. That means that any Bluetooth devices that you want to connect to Home Assistant need to be in range of the device that you’re running Home Assistant on. I recently moved my Raspberry Pi to a different location, which meant that it was out of range of one of my Bluetooth thermometers.
A Bluetooth proxy acts as a kind-of bridge between Bluetooth and Wi-Fi. You place the proxy device within range of the Bluetooth devices that you want to connect to Home Assistant, and connect it to your home Wi-Fi network. Once set up, Home Assistant should see your Bluetooth devices as if they were in range.
If you’re running Home Assistant Container, then a Bluetooth proxy may also be easier to set up than a USB Bluetooth dongle. Passing USB devices into a Docker image doesn’t always work well.
It’s worth noting here that Bluetooth proxies are just a Home Assistant ‘thing’. They won’t help you connect a Bluetooth speaker to, say, a smartphone that’s out of range. Also, you can’t buy a device that works as a Bluetooth proxy out of the box. Seriously, if you go onto Amazon and search for ‘Bluetooth proxy’(sponsored link), all you will get is results for Bluetooth adaptors and development boards with ESP32 chips.
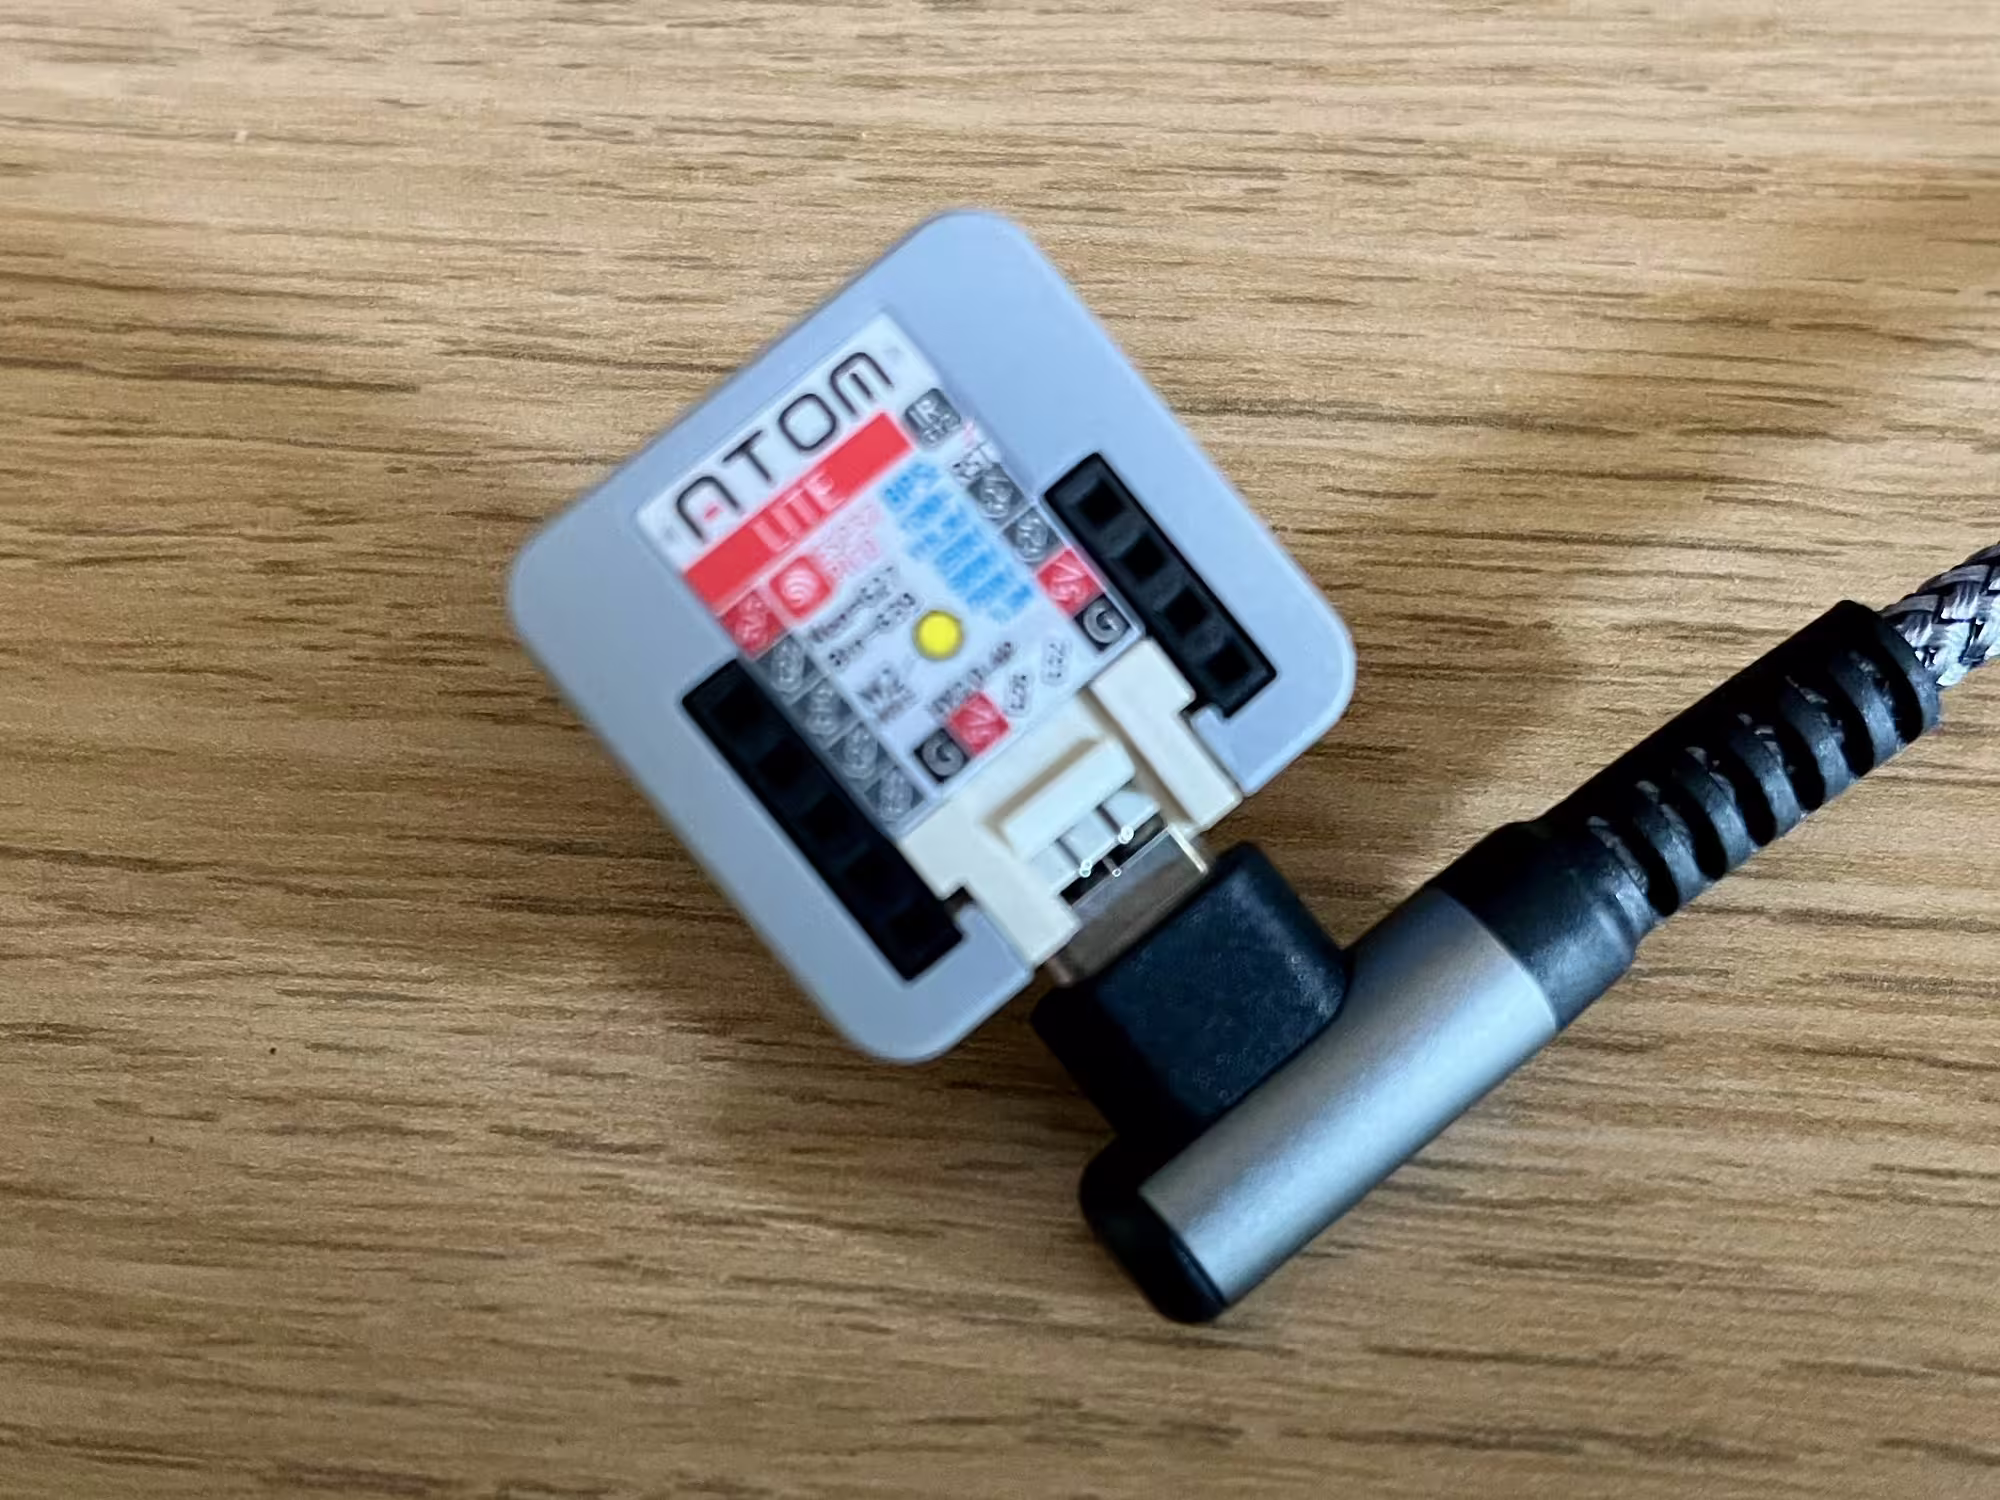
The M5Stack Atom Lite
Whilst there are lots of boards that you can buy, a good option is the M5Stack Atom Lite (also available from AliExpress, where I got mine). This is because it comes with a plastic case, and connects easily using a USB-C cable. You could buy a different board and make your own case for it, but I don’t have a lot of time right now and don’t own a 3D printer. Besides, it costs less than £10 delivered.
The device is tiny – about the size of a 50p piece, and less than a centimetre thick. Because it’s a development board, it also comes with several pins to connect to other devices, but these aren’t necessary if you’re just using it as a Bluetooth proxy. Inside, is the Espressif ESP32 chip.
There are other ESP32-based products in the M5Stack Atom range, that add (for example) a microphone or GPS chip, but again, we don’t need these for a simple Bluetooth proxy.
Installing ESPHome
ESPHome is a sister project to Home Assistant, as they’re both managed by the Open Home Foundation. It’s similar to Tasmota, which I’ve blogged about before, in that they’re both custom firmware packages that you can flash onto ESP devices. Whilst Tasmota and ESPHome can do many of the same things, if you want a Bluetooth proxy then you’ll need to use ESPHome as Tasmota doesn’t support it.
Probably the easiest way to install ESPHome is using one of the ready-made projects. These can be flashed directly from your web browser, as long as you’re using Chrome or Edge (Firefox doesn’t yet support WebSerial so won’t work). You’ll need to connect your Atom Lite to your computer using a USB-C cable that supports both data and charging. You may also need to install the USB drivers – on my Windows 10 machine, the ‘CH9102_VCP_SER_Windows’ download worked. You should then be able to install the firmware, which will take a couple of minutes. Once done, you’ll be prompted for your home Wi-Fi network name and password, and then you should be good to go. Home Assistant will hopefully detect your new Bluetooth proxy automatically.
Managing your Bluetooth proxy in ESPHome
I used ‘hopefully’ in the previous sentence, because this didn’t happen in my case. As I used Home Assistant Supervised, I was able to install the official ESPHome addon; if you use Docker, you can just run docker pull ghcr.io/esphome/esphome to install it. Once installed, the ESPHome addon/docker image should detect your Bluetooth proxy and allow you to ‘adopt’ it.
This will let you view the hostname of your Bluetooth proxy device, which will be something like ‘atom-bluetooth-proxy-wibble.local‘. You can then add the ESPHome integration to Home Assistant, specifying the hostname, and you’ll be good to go. As soon as the integration was working, Home Assistant was able to see a new Bluetooth device and allowed me to configure the integration.
One thing to bear in mind is that Bluetooth and Wi-Fi both use the same 2.4 GHz frequency band. So, if you’re comfortable building your own board with a wired Ethernet connection instead of Wi-Fi, then you may get better performance.
When I started acquiring smart devices for my home, my focus was on those that worked over Wifi (or Ethernet) – I wasn’t really aware of the likes of Zigbee, Z-Wave and other protocols that were out there. In particular, I avoided those that required the purchase of a hub or bridge, due to the higher upfront cost.
Now that I’m further along my smart home journey, I’m more open to considering a range of different protocols. They all have their advantages and disadvantages to consider.
Wifi (and Ethernet)
I’m grouping these together as devices that are visible to a standard home network and have their own IPv4 address. The majority of smart home devices use Wifi, as there’s usually no need to buy an additional hub or bridge. Therefore, set-up is usually easy (sometimes aided by Bluetooth), and their range is fine as long as they can pick up your home’s Wifi signal. It’s also very easy to connect these devices to cloud services.
In terms of disadvantages: Wifi primarily uses the 2.4 GHz frequency band, which is used by lots of things and so there’s a potential for interference. The ease of connecting these devices to the cloud can also be seen as a flaw; they’re more susceptible to being compromised by bad actors, and don’t offer as much privacy. Wifi is also quite power-hungry – devices that don’t plug into the mains will need their batteries changing more frequently.
Bluetooth
As mentioned, Bluetooth is often used with Wifi to initially provision devices, but some Bluetooth-only devices can be used in a smart home. For example, there’s my Bluetooth thermometers, which connect to Home Assistant. Compared to Wifi, power requirements are much lower and so Bluetooth is good for battery-powered devices. They’re also more private, as they can’t easily be connected to from the wider internet.
However, Bluetooth has quite a limited range – it’s designed to be a ‘personal’ area network and won’t reach across large houses. You can use a Bluetooth Proxy in Home Assistant to extend the range, and whilst these devices are cheap, you’ll need to be comfortable flashing custom firmware and will usually need to plug them in as they bridge to Wifi. Like Wifi, it uses the 2.4 GHz band and so interference is possible – especially with the lower signal strength. Bluetooth connections also tend to be between two paired devices.
Zigbee
Zigbee is a mesh protocol, and it’s used by a number of smart home brands such as Philips Hue and Ikea Tradfri, as well as UK smart meters. This means that all devices on the same network talk to each other, and so a network with lots of devices could theoretically be quite strong. Like Bluetooth, there’s additional privacy as these devices aren’t connected directly to the internet like with Wifi. It’s also more energy efficient than Wifi, so battery-powered Zigbee devices will last longer between charges.
The key disadvantage of Zigbee is that you need a bridge to link it to your home network. Manufacturers like the aforementioned Philips and Ikea will sell you a hub that does this, although you can also buy USB dongles. Therefore, there’s a higher initial cost as you have to buy a hub as well as your devices. And it’s another 2.4 GHz protocol, so could have the same interference issues as Bluetooth and Wifi.
Whilst Home Assistant has good Zigbee support, both natively and through the Zigbee2MQTT system, if you don’t have a separate hub then getting these devices into Google Home can be a very involved process. Alexa is a little easier thanks to the Emulated Hue integration.
Thread
Thread is based on the same 802.16 standard as Zigbee, but differs in a couple of ways. Firstly, devices on a Thread network have an IPv6 address. Secondly, Thread is a simpler protocol that focuses just on being a mesh network with Matter taking over the device APIs. The benefit of integrating with Matter is that, unlike Zigbee, you may not need a separate bridge for Thread devices. A number of smart speakers from Google, Amazon Alexa and Apple can also act as Thread Border Routers, so it’s possible that you’ll already have the infrastructure in place in your home for Thread devices. Like Zigbee, Thread is a mesh network, and by using Thread Border Routers, the devices have a degree of separation from the wider internet that should improve privacy and security.
The downside is that Thread is still pretty new, and so there aren’t many Thread devices out there yet. You may also find that each device that incorporates a Thread Border Router creates a separate Thread mesh network. Home Assistant can be configured to join a preferred network, but it can be a bit of a faff. Ideally, they should all make one big, strong mesh network across your home, but we’re not there yet. And, once again, we’re dealing with a 2.4 GHz protocol here.
Z-Wave
Z-Wave sets itself apart from the aforementioned protocols by being on the lower 800-900 MHz frequency range. These lower frequencies have a longer range, and so are more suited to larger homes, but also avoid the interference of the 2.4 GHz band. Like Zigbee, it’s a mesh network, and should have similar privacy and security benefits by not being connected directly to the internet.
This also means that Z-Wave has the same disadvantage as Zigbee in that you’ll need a bridge to expose these devices to your home network. Furthermore, Z-Wave devices tend to be more expensive, so the upfront cost is usually higher than other protocols mentioned here.
RF and Infrared
I’m including these for the sake of completeness, but they’re not ‘smart home protocols’ in the same way as the above. It’s possible to connect the likes of Home Assistant to bridge devices that can communicate over Wifi and 433 MHz RF or Infrared. These will typically be doorbells or remote controls for devices that don’t connect using any of the above. But setting them up can be trial and error, and involves detecting and interpreting codes to trigger automations.
If you’re building a smart home system, then a bridge may be useful to bring existing devices in that don’t support standard smart home protocols. But if you’re looking to buy new devices, stick with the ones above.